Search results
From Synfig Studio :: Documentation
Create the page "Raise Layer" on this wiki! See also the search results found.
Page title matches
File:Adding-Layer-tutorial-6-raise-layer-0.63.06.png Adding-Layer-tutorial-6-raise-layer-0.63.06(262 × 253 (25 KB)) - 19:33, 27 February 2013

Page text matches
- | {{Shortcut|Shift|Control|A}} || Select all {{l|Layer|Layers}} | {{Shortcut|Control|C}} || Copy currently selected layer(s) and put them in the clipboard7 KB (1,077 words) - 17:34, 17 November 2015
- Use the {{l|Text Tool}} or right click on your {{l|Canvas}} and choose {{c|<Layer>|<New>|Other|Text}} . <!-- Use of template : == Show or hide a layer, or fade the effect of a blur? == -->38 KB (6,436 words) - 21:25, 15 October 2016
- ...cient to create advanced characters and objects. To do so, Synfig uses {{l|Layer|layers}}. They are similar to layers used in other drawing applications in # Every object or {{l|Primitive Layer|element}} gets its own layer.8 KB (1,398 words) - 01:12, 7 February 2019
- ...ive_Layer|primitives}} such as {{l|Circle Layer|circles}} or {{l|Rectangle Layer|rectangles}}, that we have learn to work with {{l|Doc:Adding_Layers|previou ...create with the Spline Tool will be inserted above the currently selected layer. Keep in mind that if you want to insert a shape somewhere, you should sele10 KB (1,807 words) - 19:08, 31 July 2019
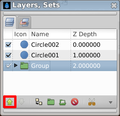
- ...our project and placed on different layers. Rather than develop each {{l | layer group}} and select them individually each time you want to change them, you * Double click over a icon of a layer from a set, selects that layer on the Layers Panel and unselects all others.6 KB (1,108 words) - 12:38, 8 November 2018
- ...ando la versión 0.61.08 o anterior, haz click derecho en el canvas o ve a Layer > New > Other > Text. ...del canvas. Si queremos que esté menos emborronado, ajustamos el {{l|Blur Layer#Size|Parámetro 'size' de la Capa de Emborronado}}.37 KB (6,349 words) - 15:44, 29 June 2016
- One of the less obvious features of Synfig is buried in the Import Image layer. In addition to being able to import some basic still image file types, it ...default framerate of 24 FPS. On the canvas, select the Caret > Layer, New layer, Other, Import Image.11 KB (1,841 words) - 18:14, 18 August 2019
- {{Title|Layer Menu}} You can obtain a Layer Menu with either a context-click on the {{l|Layers Panel}} or using the {{0 members (0 subcategories, 0 files) - 10:25, 30 September 2016
- ...вращаются в {{l|Region Layer|области}} или {{l|Outline Layer|контуры}}. Аналогом инструмента BLine в друг Затем увеличьте {{l|New Layer Defaults#Default Line Width|толщину линии}} (справа от20 KB (247 words) - 21:10, 6 June 2012
- {{Title|Clamp Layer}} == About Clamp Layer ==1 KB (183 words) - 17:34, 2 March 2017
- | <Control>-C || Copy currently selected layer(s) and put them in the clipboard ...l>-V || Paste the layer(s) from the clipboard above the currently selected layer4 KB (708 words) - 03:14, 31 December 2014
- ...lienzo. Si desea reducir el desenfoque, ajuste el {{l|Blur Layer#Size|Blur Layer's 'size' parameter}}. ...o crean una nueva Capa de Región ({{l|Region Layer}}) seleccionando "New Layer-> Geometry-> Region". Asegurece de que la capa creada quede seleccionada.16 KB (2,833 words) - 09:51, 8 September 2009
- .... (Si vous voulez diminuer l'étendue du flou, il faut ajuster la {{l|Blur Layer#Size|Taille du flou}}.) ...sé de plusieurs {{l|Layers|calques}}), nous allons utiliser le {{l|Rotate Layer}}.34 KB (5,845 words) - 00:10, 15 September 2016
- * an orange color layer to turn on the heat ...fire_tutorial_flame_intensity.png|200px|thumb|right|The ''intensity mask'' layer]]7 KB (1,227 words) - 11:12, 20 May 2013
- ...fire_tutorial_flame_intensity.png|200px|thumb|right|The ''intensity mask'' layer]] # Añade una capa nueva {{l|Noise Gradient Layer|Gradiente Ruidoso}} negra y blanca, llámala '''base noise''' y cambia su '8 KB (1,289 words) - 11:42, 3 June 2010
- * an orange color layer to turn on the heat 1. Add a new black & white {{l|Noise Gradient Layer}}, name it '''gr-nsClouds''' and change these values/parameters for the clo8 KB (1,308 words) - 11:12, 20 May 2013
- [[Image:Adding-layers-tutorial-6-raise-layer.png|center|frame]] ...就是{{c|新建层|{{l|Blur Layer Category|模糊}}|{{l|Blur Layer|Blur Layer Category}}}}—> –>模糊”)。7 KB (196 words) - 17:44, 21 June 2011
- ...ra criar objetos e personagens mais complexos. Para isto, o Synfig usa {{l|Layer|camadas}}. Elas são similares às camadas usadas em outros aplicativos par ...amente''' embaixo delas. Em outras palavras, se você colocar uma {{l|Blur Layer|Camada de Desfoque}} no topo das camadas dentro da {{l|Paste Canvas|Tela In8 KB (1,395 words) - 00:40, 11 July 2010
- ...ealizzare personaggi e oggetti avanzati. Per fare questo, Synfig usa i {{l|Layer|piani}}. Questi sono simili a quelli usati in altre applicazioni in cui son ...ettamente al di sotto'''. In altre parole, se si dovesse porre un {{l|Blur Layer|Piano di Sfocatura}} sopra i piani interni alla {{l|Paste Canvas|tela in li7 KB (1,098 words) - 10:16, 24 September 2011
- ...en hahmojen ja kappaleiden tekoon. Niiden tekemiseen Synfig käyttää {{l|Layer/fi|tasoja}}. Ne muistuttavat muissa piirrosohjelmissa käytettäviä tasoja ...an itsensä alapuolelta'''. Toisin sanoen, jos aikoisit heittää {{l|Blur Layer/fi|sumennustason}} tekemämme {{l|Paste Canvas|leikekankaan}} sisälle muid8 KB (1,113 words) - 22:06, 12 January 2011