Doc:Reuse Animations
Introduction
One of the goals of all animators (especially the lazy ones like me) is to have the opportunity to reuse pieces of animation. It allows you to save a lot of time if you can insert some portions of animations already recorded into any other position in time.
This is especially useful for making characters speak because you have to move your character's mouth to repeated positions depending on the phonemes it describes while speaking.
This can be done easily just using a combination of keyframes and exported canvases.
Keyframes
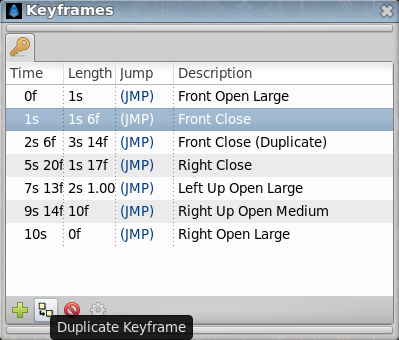
Our goal is to record some sort of animation and reuse it later. This can be done using keyframes. If you create some keyframes at the beginning of your animation you can reuse these "poses" at a later point in time just by duplicating the keyframes at another time position. To do that just do following:
- Create a Keyframe at a frame (all of our keyframes should be created close to each other to use a small portion of time. We only want to record a "pose" not a transition)
- Modify your objects in the way you want (for example make an eye close just by moving the points of the eyelid).
- Give a name to the keyframe just by clicking on its corresponding Description cell.
- Repeat the above steps as many times you need to make a new "pose". Let's say you have created a keyframe at frames number 2 (eye open) and 4 (eye closed)
- Once done then go to another frame with the time cursor, select the keyframe you want to introduce and press the "Duplicate keyframe" button. You'll obtain a copy of the selected keyframe at the current time cursor position.
There is a problem with this technique. You are making copies of the entire animation poses that you have stored in the first keyframes of the time (frames 2 and 4 of the sample) and therefore you have made copies of all the other objects existing in the scene (following the example, the eyeball).
If you already have an eyeball animation recorded and you overlap an eyeblink (open and closed) set of keyframes in the middle, then the eyeball animation would be broken by the insertion of the copies of the eyelid movement keyframes.
Exporting the Canvas Parameter
Every time you group the layers, you obtain a Group Layer that prevents the composition of the contained layers over layers outside of it.
One of the parameters of the Group Layer is the Canvas. The canvas is like a workspace that represents all the grouped layers.
To avoid the problem described in the previous section (the keyframes affecting all the objects in the scene) you can do following:
- Before creating the keyframe poses of the eyelids, group all the layers that form the eyelids.
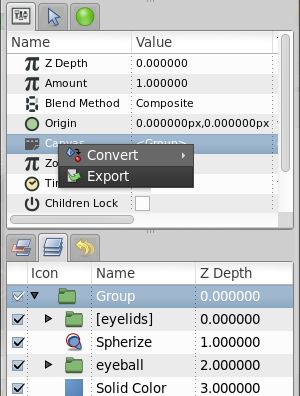
- Select the Group layer and select the Canvas parameter in the Parameter Dialog.
- Right click the Canvas parameter, export it, and give it a name (in the sample this will be "eyelids").
Go to the Canvas Browser Panel and select the just exported canvas.
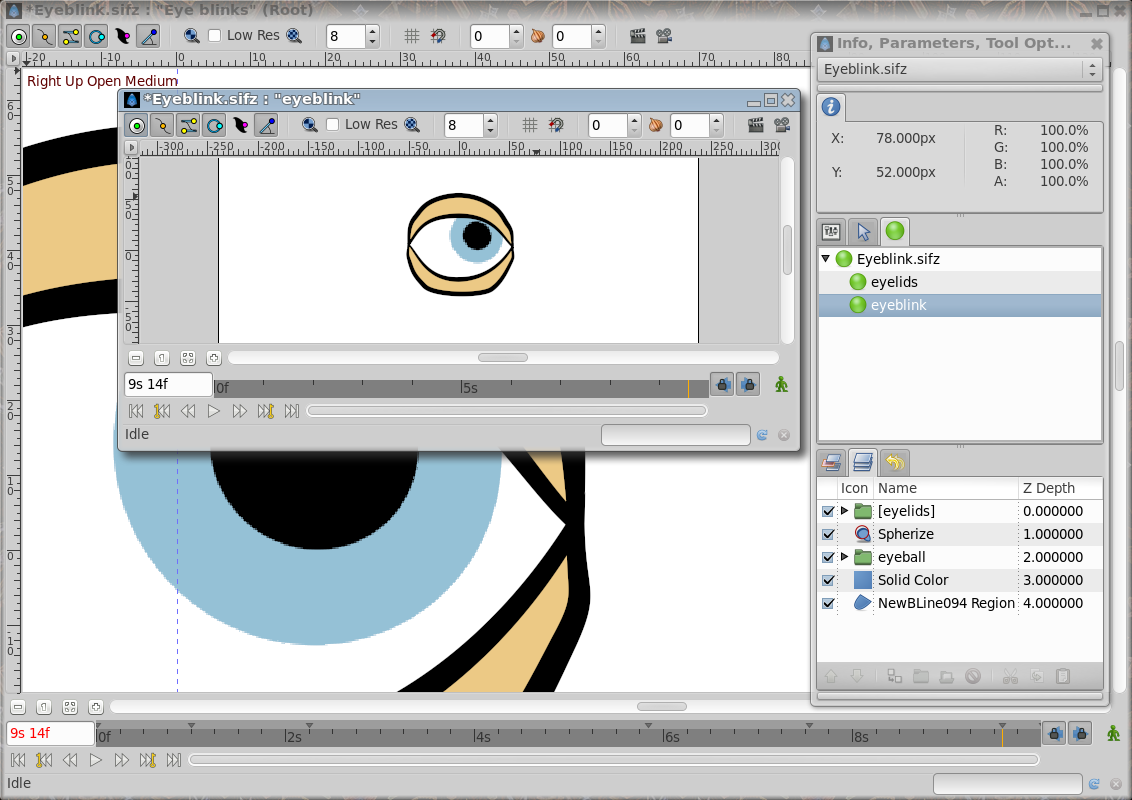
Double click it and a new workarea window will open with just the layers that were grouped at the step 1 - the "eyelids" canvas in the sample.
Create all the keyframes you need to store your "poses". Once done go to the proper frame and insert a copy of the pose keyframe. It will produce a keyframe in the "eyelids" canvas, but will not produce any keyframe on the other layers (for example the eyeball). This allows to independently animate of a portion of the model separated from the rest. Be sure that the exported canvas is as long as the animation.
Now once you have stored the eye blinks (open and closed) at the desired position you can go to the main window (just close the "eyelids" canvas work area). You'll see that all the modifications have been transmitted to the main animation but they haven't created any keyframes in the main work area. Even the layers that are inside the "eyelids" Group layer don't have any keyframes (you can see an indication that there are keyframes in the exported canvas - dashed vertical lines - but no keyframe is displayed in the keyframe dialog). Anyway, you can see the waypoints created by the keyframes and tweak them, but not the keyframes themselves. To modify the keyframes you should edit the exported canvas again in its own work area. If you modify the grouped layers from the main work area, waypoints will be created according to the main work area keyframes, not the exported canvas work area, so you will get different effects depending upon which work area you use to modify the grouped layers.
Now, once you have created your animation of the eyelids you can go to the eyeball and modify it to your taste, inserting keyframes or waypoints with no worries about interfering with the eyelid animation. Also you can animate the eyeball before and make the animation of the eyelids later. They won't interfere with each other.
It would be a great improvement if you could connect the time cursors of the main work area and the exported canvas work area to show both windows at the same current time. This would give feedback on where to insert the 'pose' keyframes in your local animation.
A sample
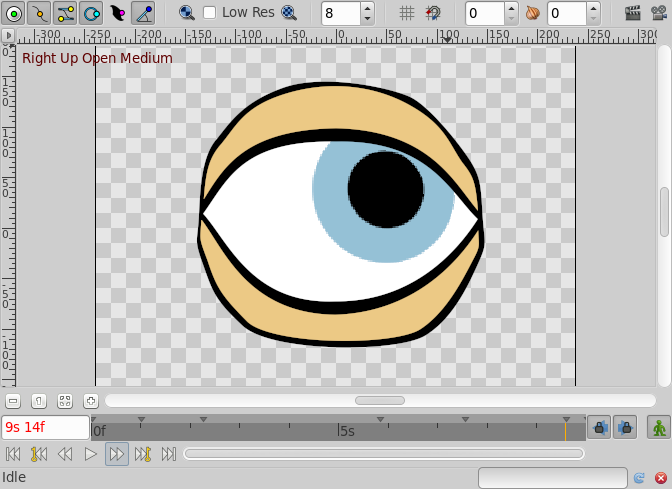
Here you can find a sample animation of a blinking eye (the closed and open positions are copies of the keyframes "Open" and "Closed", while the eyeball moves independently in its own animation.
I have stored the poses "Open" and "Closed" at frames 0 and 2. The animation is defined to start at frame 6.
All comments are welcome.
