Dev:IDE Linux
Contents
Want to setup an IDE to debug / develop synfig ?
Here, we will not discuss of witch IDE is better or if real hacker do all with vi/emacs
|
Clone the code my dear This assume you already cloned the code from git
|
|
OpenGL support currently broken OpenGL support is currently broken and the compilation of synfig-core will crash unless you compile it with --without-opengl. See [this forums post] for more details. (you can also modify synfig-core's configure.ac in the section --with-open which is active by default)
|
Anjuta from gnu/linux
(Tested with Anjuta 3.14.0)
First build !
This will generate all needed makefile
- Open "autobuild/synfigstudio-linux-build.sh" and change "DEBUG=0" to "DEBUG=1" (line 76)
- Build from "autobuild/synfigstudio-linux-build.sh"
- During this time install "anjuta" from synaptic or whatever ... (from xubuntu 14.10 you must install Anjuta 3.14 from this ppa for example : see here why)
when anjuta installed and synfig builded....
Import synfig (etl / core / studio) projects in Anjuta
- Open Anjuta, in "Action" choose "Import a project" and choose your code location (synfig/ETL , synfig/synfig-core or synfig/synfig-studio)
- Select a project name and Import
- At the project backend choice, select "Autotools" and go for it (if you kept the default project name, replace the existing project with the new one)
- Wait a minute ... project loaded !
Repeat for each synfig project
Your now able to build from Anjuta.
Want to debug maybe ?
- From Anjuta "<Menu> → <Execute> → <Program Paramter> → Program" : select synfig-studio binary "/home/user/synfig/bin" (i also setup the working directory)
- Now you need to clean the project and build it again (but this time from anjuta)
- Anjuta "<Menu> → <Build> → Clean"
- Anjuta "<Menu> → <Build> → Build"
you (shouldbe) are ready to debug / improve / patch and share !
Extra note
As Anjuta projects are saved in git examined folders, you could have sort of behavior when you git your code ... personally i have made a little script to backup/restore my own project to keep the folder safe of undesired change (.gitignore is also git surveyed !)
Eclipse from gnu/linux
(Tested with Eclipse 3.8.1)
First build !
This will generate all needed makefile
- Open "autobuild/synfigstudio-linux-build.sh" and change "DEBUG=0" to "DEBUG=1" (line 76)
- Build from "autobuild/synfigstudio-linux-build.sh"
- During this time install "eclipse" & "eclispe-cdt" packages from synaptic or whatever ...
when eclipse installed and synfig builded....
Import synfig (etl / core / studio) projects in Eclipse
Open Eclipse, choose your desired place for the workspace (i recommend not in ./synfig folder if you want to commit, better just above)
For each synfig component (etl / core / studio ...)
- Eclipse / Menu / Makefile project with existing code
- Choose your project name (etl / core / studio ...)
- Select code location (synfig/ETL , synfig/synfig-core or synfig/synfig-studio)
- Select your toolchain ... and click Finish ... and Wait a little ...
Your now able to build from Eclipse.
Want to debug maybe ?
- From "Project Explorer" panel, select your project properties (alt+enter / menu-project or right clicking)
- In "C/C++ Build" Uncheck "Use default build command" and put a "make -j2 install" (-jXX at your connivance ...)
- In "Run/Debug Setting" click "New" or "Edit..." , in C/C++ Application , browse and select the synfig-studio binary from "/home/user/synfig/bin"
Stop on Startup, what the heck ?
- Make sure you are in the c++ perspective, then go to menu Run -> Debug Configurations. Make sure your application is chosen in the left pane, press the Debugger tab, and uncheck Stop on startup at: checkbox. How to stop GDB from executing “break main” by default in Eclipse?
you (shouldbe) are ready to debug / improve / patch and share !
Have a functional environment
Add Includes paths to Code Analysis
- From "Project Explorer" panel, select your project properties (alt+enter / menu-project or right clicking)
- In C/C++ General / Paths and Symbols / Includes , add all the paths you need (ETL / Synfig-core / Cairo / Gtkmm ....)
Netbeans from gnu/linux
(Tested with Netbeans 8.0.2)
What Netbeans is?
Done following the video tutorial made by Konstantin Dmitriev (in russian ;))
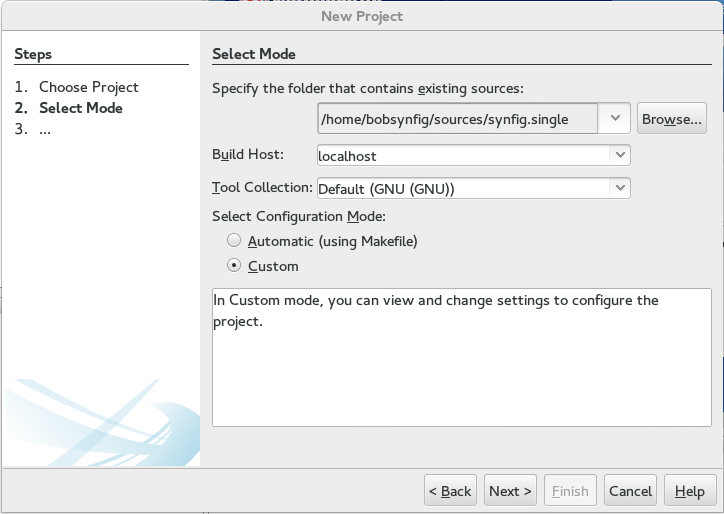
Assuming the source will be installed in /home/yourUsername/sources/synfig.single in the screenshots
Don't forget to replace it with your own userName!
Install Netbeans
Be aware you need to have a JDK devel package installed on your machine to be able to install Netbeans
On Fedora, I had to install it with the following command
"yum install -y java-1.8.0-openjdk-devel" (or "dnf install -y java-1.8.0-openjdk-devel" on latest version)
Install "Netbeans" from synaptic or from the original download page, if not done already ...
First build !
This will generate all needed makefile
- Open "autobuild/synfigstudio-linux-build.sh" and change "DEBUG=0" to "DEBUG=1" (line 76)
OR
- Another possibility (like on the video) is to set DEBUG=1 (and a space) before the script name in the console
in the console enter:" /home/yourUsername/sources/synfig.single/autobuild/synfigstudio-linux-build.sh"
when Netbeans installed and synfig builded....
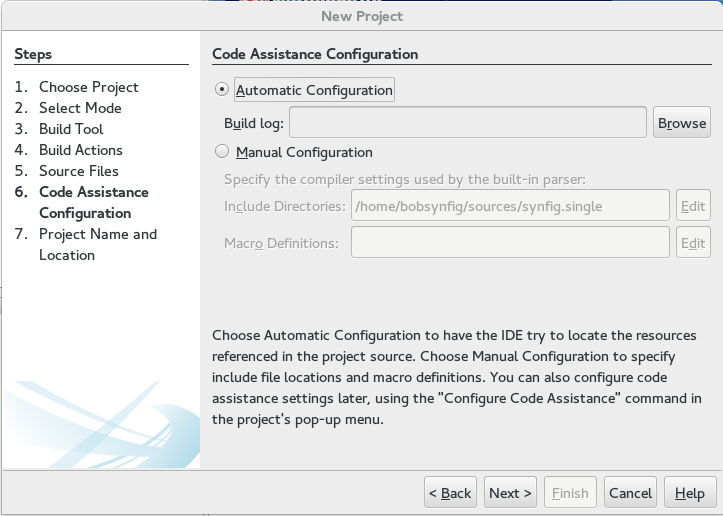
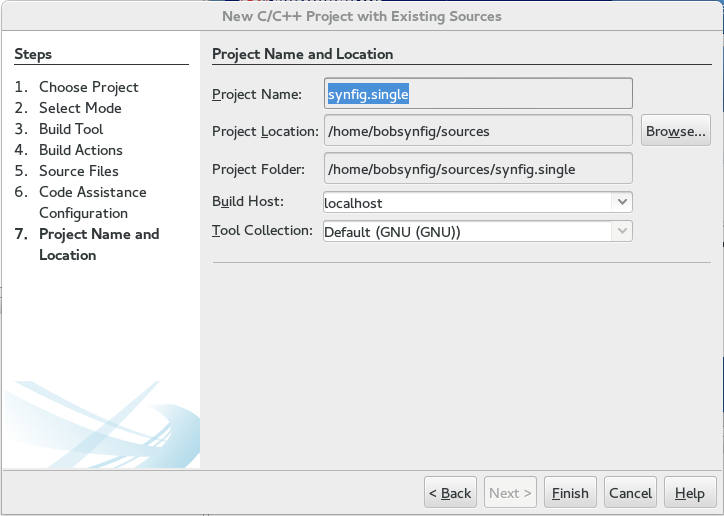
Import synfig (etl / core / studio) projects in Netbeans
- Open Netbeans
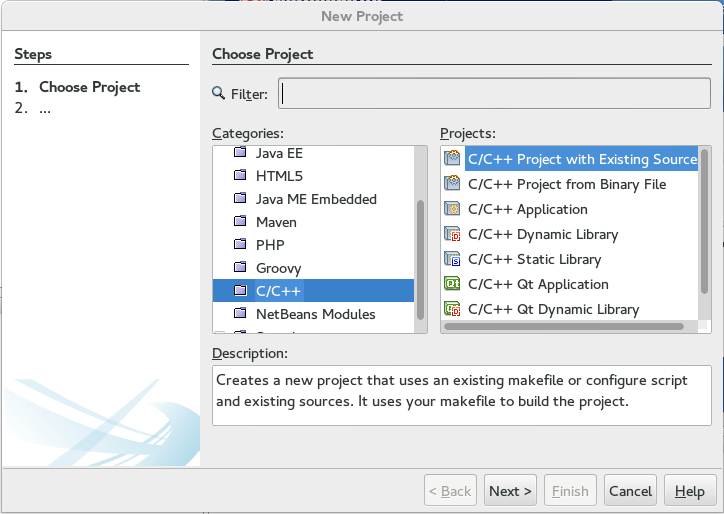
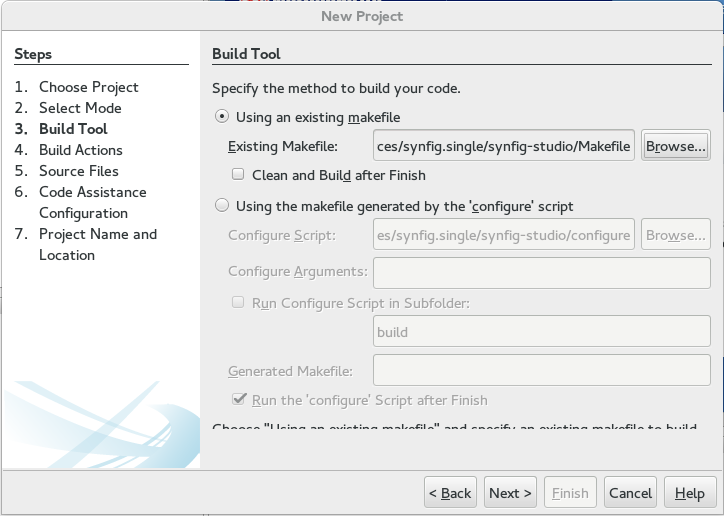
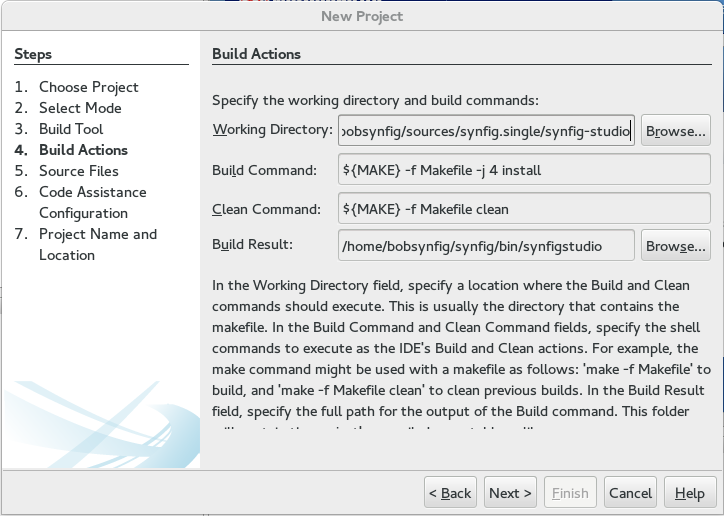
- Open File/New Project....
- Press "Finish"
- Wait a minute ... project loaded !
You are now able to build from Netbeans.

