Difference between revisions of "Gradient Editor Dialog"
m (Added a caoture of context menu and a new capture for the final sample.) |
m |
||
| Line 1: | Line 1: | ||
| − | The Gradient Editor Dialog | + | The Gradient Editor Dialog has two sections. The top part is for selecting the colors and alpha level and the lower part contains a preview of the gradient. |
| − | + | ||
| + | Just below the preview area there are two small triangles, called CPoints, that denote the initial and final colors of the gradient. | ||
| Line 6: | Line 7: | ||
| − | The | + | The currently selected CPoint is displayed as a white triangle. Its color is shown in the top part of the dialog for editing. You can select any of the other CPoints by clicking on their triangles to edit the other colors of the gradient. |
| − | For example modifying the red, green and blue channels you can | + | For example by modifying the red, green and blue channels of the CPoint on the right hand side you can change the final color of your gradient (preset to white) to a nice dark yellow like in the following example. |
| Line 13: | Line 14: | ||
| − | Gradients are not limited to two colors | + | Gradients are not limited to two colors; you can have as many colors as you want in the gradient. To do that you just need to right click into the gradient preview and select "Insert CPoint". With this you'll insert a new triangle in the place where you made the right click. Then you can edit that color with the color and alpha sliders and create a tricolor gradient. |
| Line 22: | Line 23: | ||
Here I've created some sort of transparent light cyan for the central color. | Here I've created some sort of transparent light cyan for the central color. | ||
| − | Another cool feature is that you can slide the triangles just like you slide the color or alpha bars. With this you can compress the gradient to one or to other side or make its falling more quick or slow between colors. | + | Another cool feature is that you can slide the triangles just like you slide the color or alpha bars. With this you can compress the gradient to one or to other side or make its falling more quick or slow between colors. CPoints can be moved more precisely by editing the numerical field just about the gradient's preview. This is a number between 0 (left edge) and 1 (right edge) specifying the selected CPoint's position. |
| Line 28: | Line 29: | ||
| − | Finally the "Grab" button | + | Finally the "Grab" button copies the edited gradient into the toolbox's default gradient. |
Revision as of 12:06, 4 September 2007
The Gradient Editor Dialog has two sections. The top part is for selecting the colors and alpha level and the lower part contains a preview of the gradient.
Just below the preview area there are two small triangles, called CPoints, that denote the initial and final colors of the gradient.
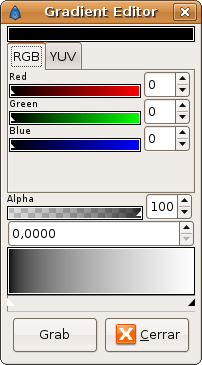
The currently selected CPoint is displayed as a white triangle. Its color is shown in the top part of the dialog for editing. You can select any of the other CPoints by clicking on their triangles to edit the other colors of the gradient.
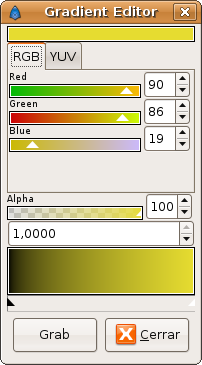
For example by modifying the red, green and blue channels of the CPoint on the right hand side you can change the final color of your gradient (preset to white) to a nice dark yellow like in the following example.
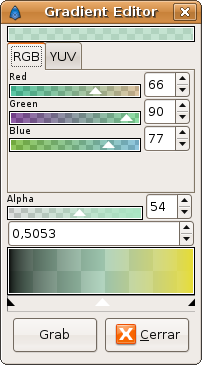
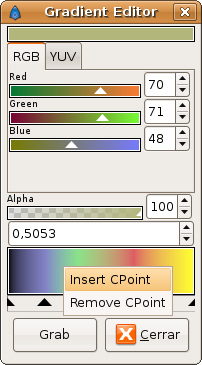
Gradients are not limited to two colors; you can have as many colors as you want in the gradient. To do that you just need to right click into the gradient preview and select "Insert CPoint". With this you'll insert a new triangle in the place where you made the right click. Then you can edit that color with the color and alpha sliders and create a tricolor gradient.
 |
|
Here I've created some sort of transparent light cyan for the central color.
Another cool feature is that you can slide the triangles just like you slide the color or alpha bars. With this you can compress the gradient to one or to other side or make its falling more quick or slow between colors. CPoints can be moved more precisely by editing the numerical field just about the gradient's preview. This is a number between 0 (left edge) and 1 (right edge) specifying the selected CPoint's position.
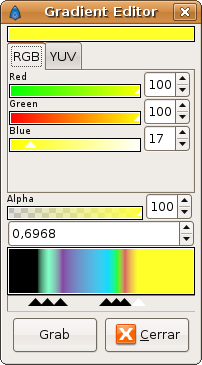
Finally the "Grab" button copies the edited gradient into the toolbox's default gradient.