Difference between revisions of "Doc:Gimp2synfig"
m (use Doc in hiperlink) |
m ({{TOCright}} + update license section) |
||
| (14 intermediate revisions by 4 users not shown) | |||
| Line 1: | Line 1: | ||
<!-- Page info --> | <!-- Page info --> | ||
| − | {{Title| | + | {{Title|Importing GIMP (XCF) images}} |
| − | + | ||
{{Category|Manual}} | {{Category|Manual}} | ||
| + | {{Category|Tutorials}} | ||
| + | {{Category|Tutorials Intermediate}} | ||
| + | {{Category|ImportArt}} | ||
| + | {{NewTerminology}} | ||
| + | {{TOCright}} | ||
<!-- Page info end --> | <!-- Page info end --> | ||
| + | =Introduction= | ||
To simplify the work of animating my cartoon about a mouse, a plug-in for the [http://gimp.org/ GIMP] raster editor has been written, to allow the direct exporting of multi-layered images to corresponding layers of the 2D animation package Synfig. | To simplify the work of animating my cartoon about a mouse, a plug-in for the [http://gimp.org/ GIMP] raster editor has been written, to allow the direct exporting of multi-layered images to corresponding layers of the 2D animation package Synfig. | ||
| + | =Installation= | ||
| + | You can download the [https://github.com/d-j-a-y/Gimp2Synfig/releases/latest synfigexport plugin here]. | ||
| − | + | <!-- NOTA : you can use File:Synfigexport-py.txt has archive 15/11/19 in case --> | |
| − | [http:// | + | To make it work, Gimp must support [http://python.org Python], and the most recent version of Python must be installed on your computer. |
| − | + | From Gnu/Linux operating system like, to install this plug-in, simply put the file in {{literal|~/.gimp-*/plug-ins/}} and make it executable {{literal|chmod u+x synfigexport.py}}, then restart gimp. | |
| − | + | The plug-in registers itself in the GIMP Export File dialog box {{c|<File>|Export}}. | |
| − | + | <!-- [[File:Gimp2Synfig-01.jpeg|center]] --> | |
| − | + | =Usage= | |
| + | * Firstly, from Gimp, save your image. | ||
| + | * Open the Export (or "Export As") dialog box, select "Synfig Studio" has file type (.sifz), choose a destination folder and a name, and exports gimp document to synfig's canvas and png images. | ||
| + | * There are export options you can choose. | ||
| − | + | [[File:Gimp2Synfig-02.png|center]] | |
| − | + | Here is the result: | |
| − | + | ||
| − | + | ||
| − | + | {|border="0" align="center" style="border-collapse" cellpadding="3" cellspacing="0" | |
| + | |-style="background:#silver" | ||
| + | |'''Initial Gimp image'''||'''Imported into Synfig''' | ||
| + | |- | ||
| + | |[[File:Gimp2Synfig-03.jpeg|center|450px]] | ||
| + | |[[File:Gimp2Synfig-04.jpeg|center|450px]] | ||
| + | |} | ||
| − | + | =License= | |
| − | + | Author: IL'dar AKHmetgaleev aka AkhIL - [http://blog.akhil.ru/ blog akhil : original work] | |
| + | Contributor : d.j.a.y [https://github.com/d-j-a-y/Gimp2Synfig Gimp2Synfig : updated fork] | ||
This program is licensed under Creative Commons Attribution 3.0 Unported License. Distribution and updating of the code is appreciated. | This program is licensed under Creative Commons Attribution 3.0 Unported License. Distribution and updating of the code is appreciated. | ||
Latest revision as of 09:55, 4 July 2016
Contents
Introduction
To simplify the work of animating my cartoon about a mouse, a plug-in for the GIMP raster editor has been written, to allow the direct exporting of multi-layered images to corresponding layers of the 2D animation package Synfig.
Installation
You can download the synfigexport plugin here.
To make it work, Gimp must support Python, and the most recent version of Python must be installed on your computer.
From Gnu/Linux operating system like, to install this plug-in, simply put the file in "~/.gimp-*/plug-ins/" and make it executable "chmod u+x synfigexport.py", then restart gimp.
The plug-in registers itself in the GIMP Export File dialog box "<File> → Export".
Usage
- Firstly, from Gimp, save your image.
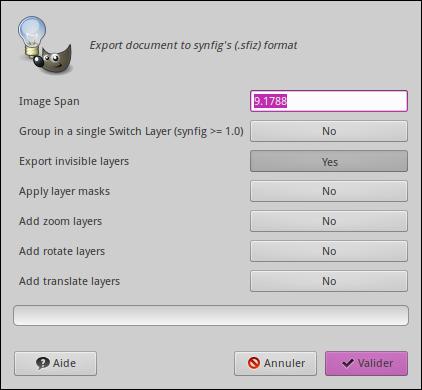
- Open the Export (or "Export As") dialog box, select "Synfig Studio" has file type (.sifz), choose a destination folder and a name, and exports gimp document to synfig's canvas and png images.
- There are export options you can choose.
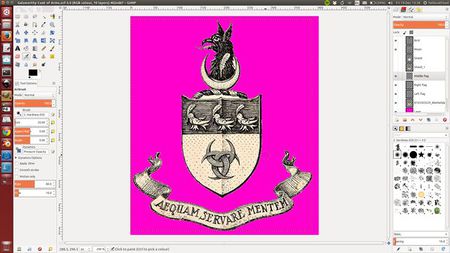
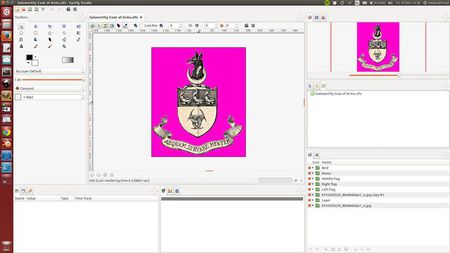
Here is the result:
| Initial Gimp image | Imported into Synfig |
License
Author: IL'dar AKHmetgaleev aka AkhIL - blog akhil : original work Contributor : d.j.a.y Gimp2Synfig : updated fork
This program is licensed under Creative Commons Attribution 3.0 Unported License. Distribution and updating of the code is appreciated.


